Tools of the Trade – Scrivener
At some point you need to consider the tools in your writer’s toolkit. I’m not referring to tricks for writing engaging dialog or chapter construction. I’m talking about the actual programs and places you go to write.
Microsoft Word is the go-to tool for most writing tasks. The Microsoft Corporation did an excellent job with Word and the other Office products but most writers won’t even scratch the surface of Word’s capabilities. It has built-in search, formatting, spell checking, and more ways to insert cool stuff into your document then you’ll ever use.
Believe it or not, there are other options. Libre Office, from the Open Document Foundation, offers a comparable tool set that run on any platform. Their word processor, Write, works well with Word documents and does all the things you expect a word processor to do. But sometimes free isn’t good enough either.
Word processors are great for general writing but being a novelist is more than just typing words into a screen. We need something more. That something would include the ability to organize and collect research, organize draft material, manage meta data (characters, plot, descriptions, etc.) with chapters.
Authors do these functions without tools. To do these functions now, you likely
- In your head (even if you don’t realize it)
- In a separate document
- On index cards
But if you had the choice wouldn’t it be better to have all of this in one tool? My answer is a resounding ‘Yes’ but I didn’t always feel this way.
Once I started using a tool I realized how much it sped and organized my writing. As a useful bit of serendipity, I stumbled upon the tool when joining National Novel Writing Month (NANOWRIMO) this year. If you ever take part in NANOWRIMO, you’ll need a way to keep yourself on track to get to the 50,000 words written in 30 days.
As it turns out, my friend Matt Jackson put me onto a product named Scrivener. Matt’s always tossing out ideas for me to try. He’s also one of the truly supportive people in my life who tell me my stories are good enough to publish. So when Matt speaks, I listen. He’s also the graphics artists if you ever find yourself in need of a book cover or interior art.
So, at Matt’s suggestion, I download Scrivener from the Literature and Latte web site. Scrivener is a tool for authors, researchers, and script writers. Rather than write a blog post about all that Scrivener can do, I’ll simply direct you to their ‘about‘ page and let you read about its features, watch a few videos, and check out some screen shots. What I will do for the rest of the article is show you how I used it for current project, Prescription for Revenge.
Scrivener is cross-platform, meaning that it runs on Mac, Windows, and Linux. Since I use Ubuntu Linux, this is an important feature. To add to its attractiveness, the Linux version is free. The Windows and Mac versions are attractively priced at $40 USD.
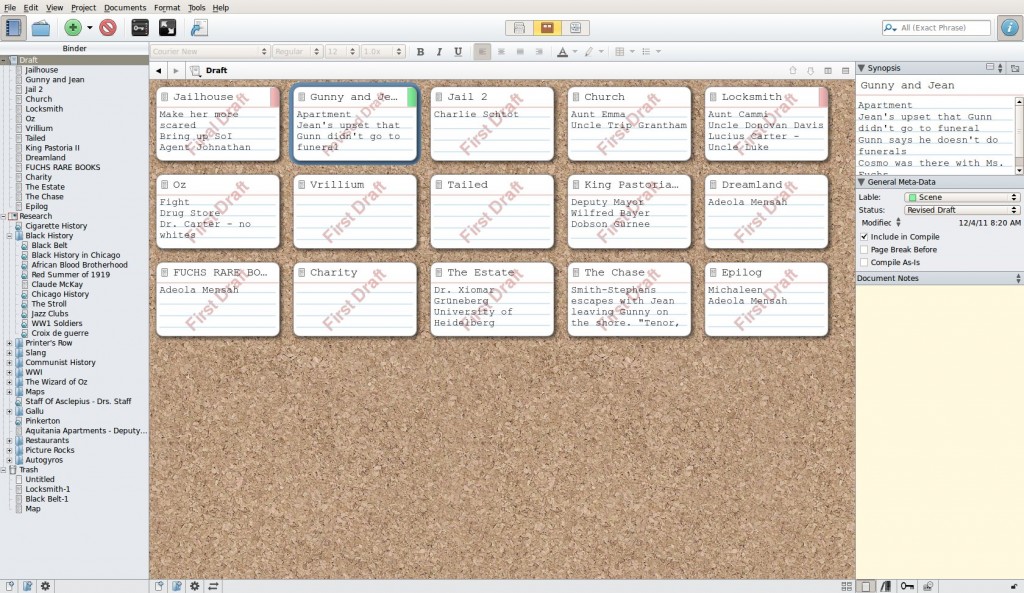
Below is a screen shot of my Scrivener project for Prescription for Revenge. The primary sections are the Binder, Main Screen, Synopsis, Metadata, and Notes.
This screenshot above shows the cork board format. It displays your chapters ordered as they are on the Binder (far left). I have the Gunny and Jean scene highlighted which displays that sections Synopsis, Metadata, and Notes off to the right.
The main editing area has three views: Edit, Cork Board, and List. You access each via the three button control above the edit window.
![]() The displayed Cork Board (above) shows the sections I’ve defined along with the first few lines of any notes I’ve typed. The Cork Board is great for moving around chapters and scenes as well as getting a quick view of the story.
The displayed Cork Board (above) shows the sections I’ve defined along with the first few lines of any notes I’ve typed. The Cork Board is great for moving around chapters and scenes as well as getting a quick view of the story.
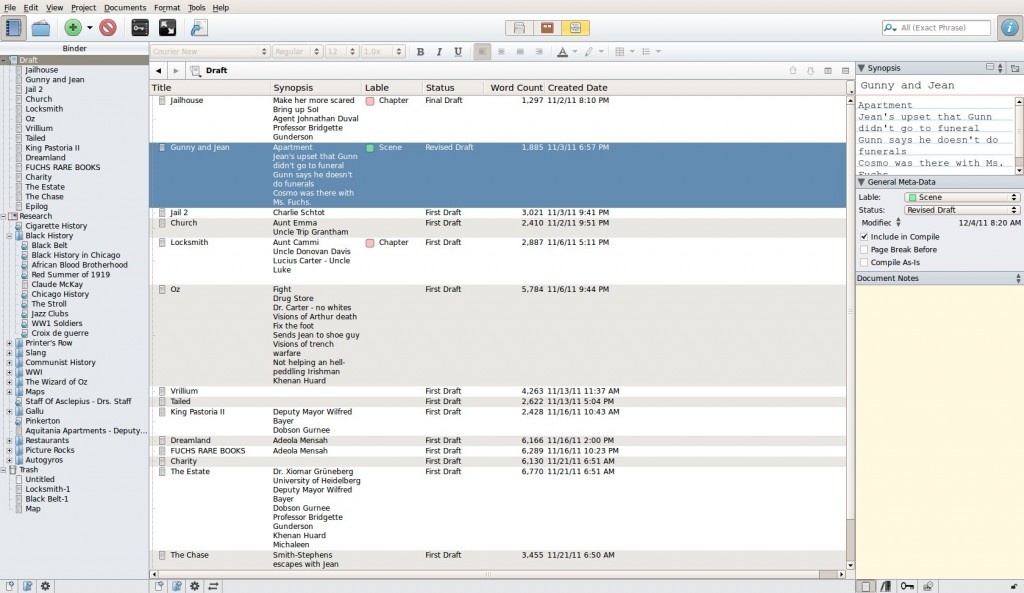
the next view of the main window is the list view (see below). It displays your work in a columnar list. You’re able to pick the columns to show so you can customize this view to your needs. As you can see from the list below, I have a flow problem. The first few chapters are very short. You can see as time went on, I hit my stride and the chapters became longer. This show’s I have some tidying to do by either expanding some chapters or combining several of my scenes into a few chapters.
The editing view of the main window has similar features found in most modern word processors. It has spell check, fonts manipulation, justification, bulleted and numbered lists, etc. It also as the ability to go full screen, removing all the other controls so there is only you and your words. Another nice feature about the Edit window is the forward and back buttons. These work like a web browser allowing you to switch to another file and then move back to the original.
 The Binder window is a standard tree view showing files and folders. By default it has three sections: Draft, Research, and Trash. You can add other categories if you wish but these sufficed for my novel. You add a document by right clicking in either the cork board or tree view and telling Scrivener what you want to add: either text, folder, file, or web page.
For holding research, web page creation is an invaluable feature. This allows the user import a page’s text into a native Scrivener file. Alternately, Scrivener will save the URL to display within its native web browser for later viewing. I used this feature extensively during NANOWRIMO.
As you can see, Prescription for Revenge required a good bit of research into the Black History of Chicago. I was able to save all this information within one folder for easy viewing while writing. It disrupts the flow of writing to switch programs while madly typing to 50,000 words. With the research folder I was able to store all my wiki and history pages in one place. then, while writing, I was able to split the screen with research and my novel up at the same time.
The right-hand side of the Scrivener window has a synopsis, metadata, and notes window. I typically use the synopsis to write myself notes about things I wish to include in the chapter as well as character names I forget how to spell. You can drag an image into the synopsis area as well. The metadata window has a label (defaults are Chapter and Concept), status (ToDo, First Draft, Second Draft, Final Draft, Done), change/creation dates, and compile flags. Notes is simply an area to type just about anything.
There is much, much more to Scrivener. To be honest, I haven’t even scratched the surface yet but it was a great tool to help me get through NANOWRIMO. I doubt my creation would be readable without it.
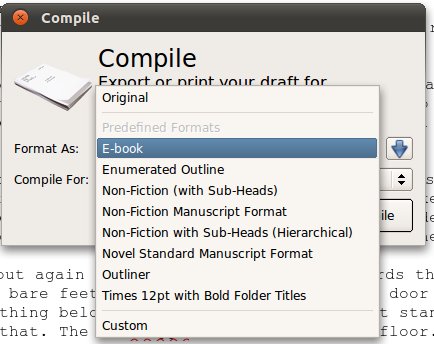
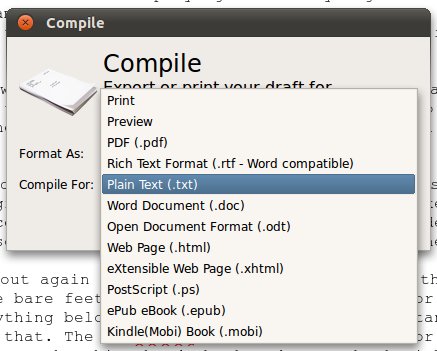
I haven’t yet compiled my one month masterpiece. From the screenshot below, it seems I can format it for either eBook or Fiction Manuscript.
I’m a little more excited about the file formats it produces. When I published The New Moon Murders, I spent a great deal of time on formatting. I can only hope this will save me those hours in an automated process out of Scrivener.
Scrivener has a thirty-day free trial. I highly recommend this product whether you write as a hobby or as a profession. The way it bundles your important files together in an easily viewable/editable format is well worth the asking price. Literature and Latte also sponsors NANOWRIMO and so some of your purchase goes to a good cause.


There are 2 Comments to "Tools of the Trade – Scrivener"
There is a public community for people who use Scrivener on Google Plus. We have over 900 members. Because this is a public community, you can read the posts and comments even if you do not choose to join us.
https://plus.google.com/u/0/communities/109597039874015233580
Thanks ffor sharing your thoughts about nanowrimo.
Regards